How to Update your ESP8266 Firmware Over-The-Air (OTA)
If you’re working with the ESP8266, you’ve probably heard of over-the-air (OTA) updates. OTA allows you to update the firmware on your ESP8266 remotely, without having to physically connect to the device or even be in the same room as it. This can be a game-changer for IoT projects, where devices may be deployed in remote locations or difficult-to-reach areas.
In this post, we’ll explore how to implement OTA updates on the ESP8266, and why it’s an essential feature for any IoT project.
What is OTA?
OTA stands for over-the-air, and it refers to the ability to update firmware on a device remotely, without having to physically connect to it. OTA updates are commonly used in the context of IoT devices, where the devices may be deployed in remote locations or difficult-to-reach areas.
OTA updates can save time and money by eliminating the need for physical access to the device, and they can also improve the security of the device by allowing security patches and updates to be applied quickly and easily.
The library
It is possible to have OTA updates using the Arduino IDE, but I find it way easier with a library called “ElegantOTA”. With ElegantOTA, you can setup your ESP8266 to receive OTA updates with just a few lines of codes.
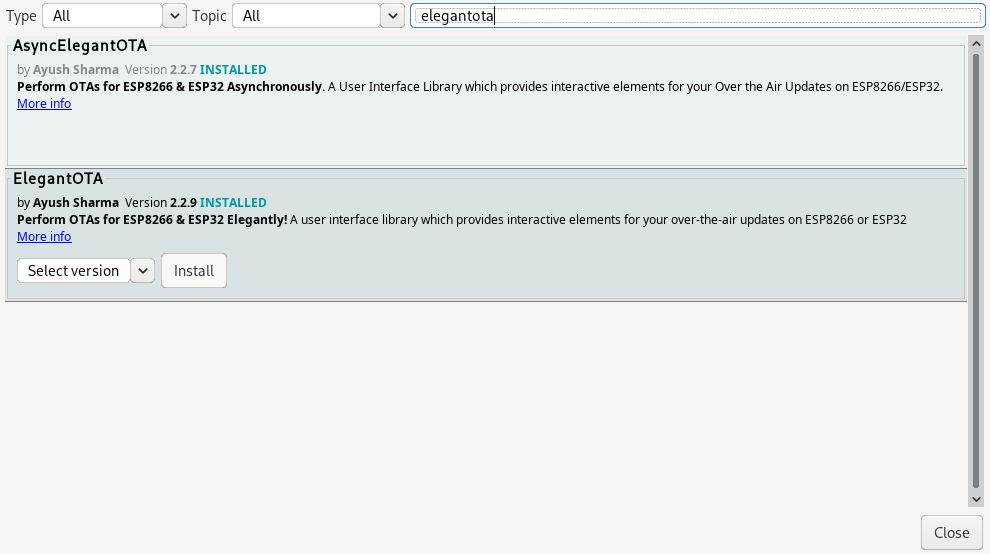
To use ElegantOTA, you’ll need to install the library in your Arduino IDE. You can do this by going to Sketch > Include Library > Manage Libraries, and then searching for “ElegantOTA” in the Library Manager:

Alternatively, you can do it by either cloning the ElegantOTA repository, or by downloading it as a ZIP file. Make sure to clone / extract it into the Arduino libraries folder.
Here’s where you can find the libraries location based on your OS:
- Windows:
C:\Users\{username}\Documents\Arduino\libraries - MacOS:
/Users/{username}/Documents/Arduino/libraries - Linux:
/home/{username}/Arduino/libraries
The code
#include <ESP8266WiFi.h>
#include <WiFiClient.h>
#include <ESP8266WebServer.h>
#include <ElegantOTA.h>

const char* ssid = "WIFI_SSID";
const char* password = "WIFI_PASSWORD";

ESP8266WebServer server(80);

void setup(void) {
  Serial.begin(115200);

  WiFi.begin(ssid, password);
  Serial.println("");

  // Wait for connection
  while (WiFi.status() != WL_CONNECTED) {
    delay(500);
    Serial.print(".");
  }
  Serial.println("");
  Serial.print("Connected to ");
  Serial.println(ssid);
  Serial.print("IP address: ");
  Serial.println(WiFi.localIP());

  ElegantOTA.begin(&server);    // Start ElegantOTA
  server.begin();
  Serial.println("HTTP server started");
}

void loop(void) {
  server.handleClient();
}
Let’s break it down
We first include the ElegantOTA.h library (along with other utility libraries):
#include <ESP8266WiFi.h>
#include <WiFiClient.h>
#include <ESP8266WebServer.h>
#include <ElegantOTA.h>
We declare constants for the WiFi settings and the WebServer instance used by ElegantOTA:
const char* ssid = "WIFI_SSID";
const char* password = "WIFI_PASSWORD";

ESP8266WebServer server(80);
As always, in the setup function we initialize the Serial interface, we wait for the ESP8266 to connect to the WiFi and we print the SSID / IP Address to the Serial Interface:
Serial.begin(115200);

WiFi.begin(ssid, password);
Serial.println("");

// Wait for connection
while (WiFi.status() != WL_CONNECTED) {
delay(500);
Serial.print(".");
}
Serial.println("");
Serial.print("Connected to ");
Serial.println(ssid);
Serial.print("IP address: ");
Serial.println(WiFi.localIP());
We initialize ElegantOTA by passing a reference to the previously initialized WebServer instance:
ElegantOTA.begin(&server);    // Start ElegantOTA
server.begin();
Serial.println("HTTP server started");
Lastly, we let our WebServer spin (with ElegantOTA injected into it) in the loop() callback:
void loop(void) {
  server.handleClient();
}
Done!
Upload a new firmware using ElegantOTA
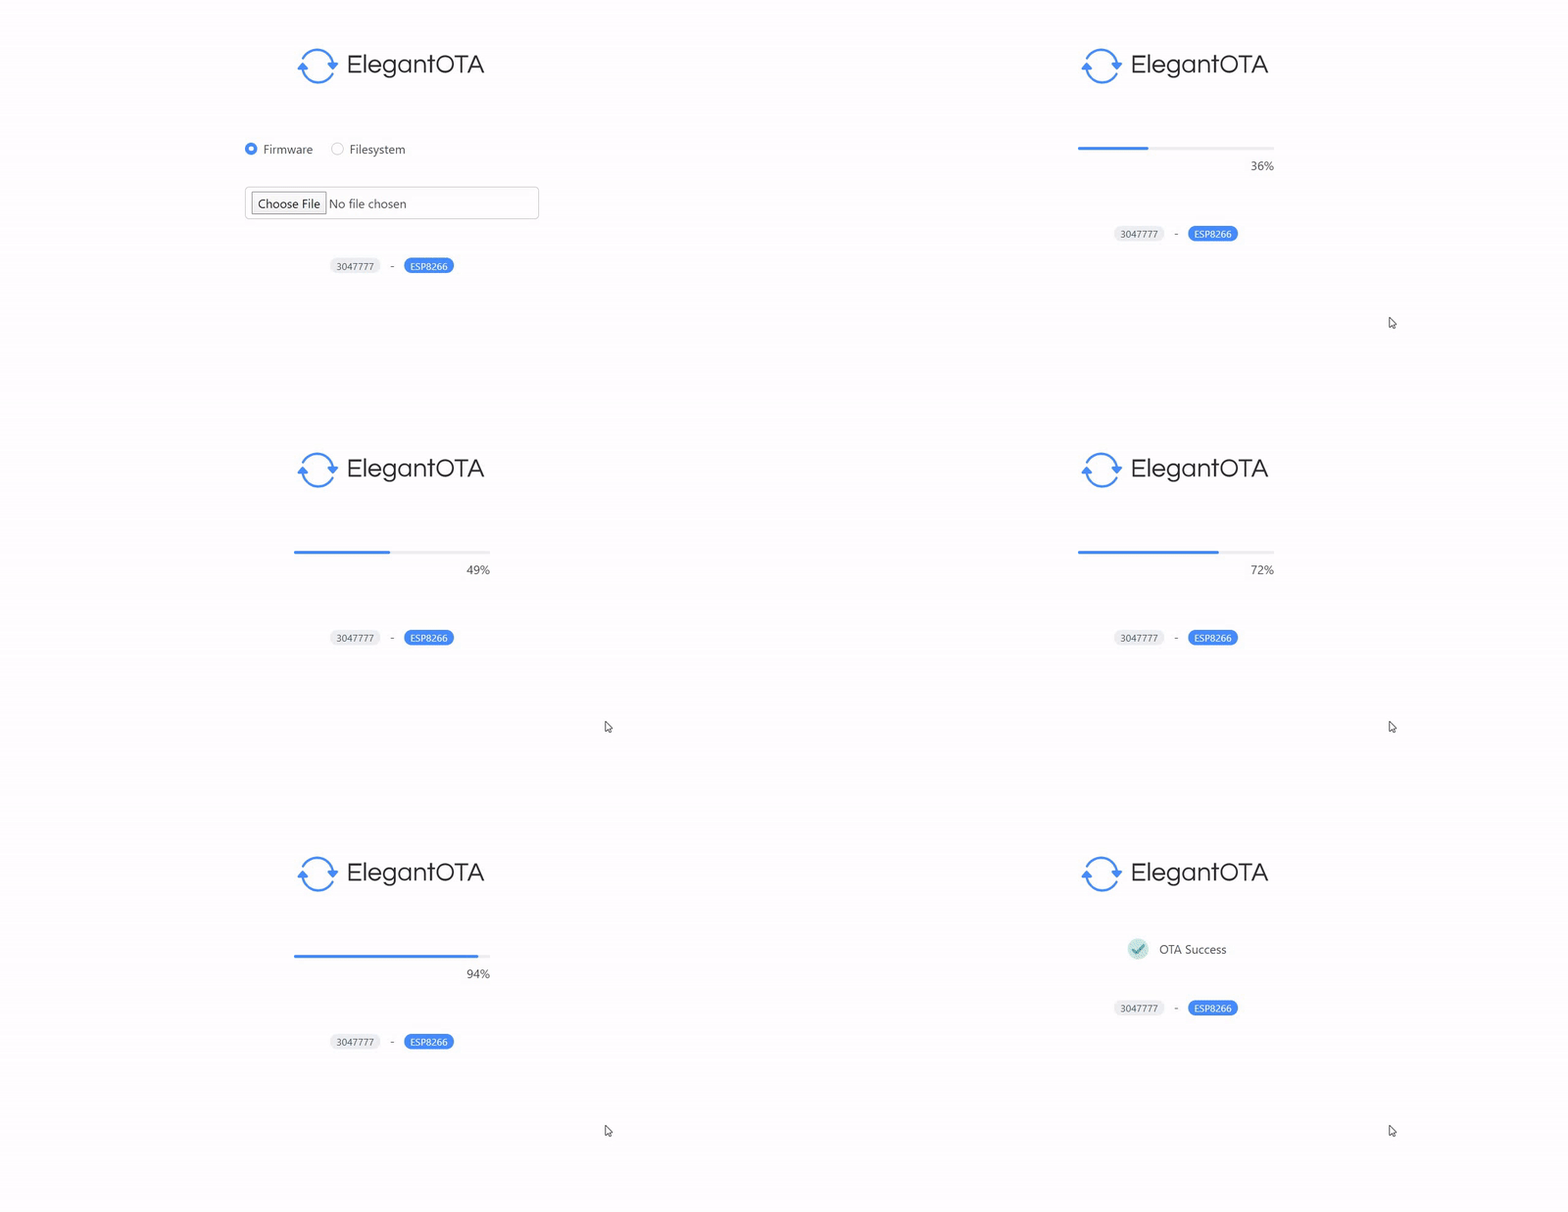
Before uploading this sketch on your ESP8266, make sure to fill ssid and password constants to your WiFi settings. Once the sketch is running, check the IP address assigned to your ESP8266 from the Serial Monitor, then open a browser on your PC and go to <ESP8266_IP_ADDRESS>/update. If everything went right, you should be presented with something like this:

ElegantOTA allows you to update both the firmware and the filesystem. We’ll only cover firmware update for now, we’ll have the filesystem in a different post.
In order to assemble a BIN file, simply open the sketch on your Arduino IDE, then head to Sketch > Export compiled Binary. In your sketch folder, you’ll find the BIN file. Now simply go back on the ElegantOTA web page, and drop the BIN in.
Wrappin’ up
I personally find ElegantOTA.. well.. really Elegant! Indeed, for just a few line of codes you can update firmware using the browser. This comes incredibly handy when you have your ESP8266 deployed to customers / friends. Having the ability to upload your firmware through the internet using just the browser.. it’s a huge plus!
I hope you found this helpful :)
Thanks!
Made with ❤️ by Mikepicker